Thursday, October 21, 2010

Batboat Rebuild: Finished for the Year.

On October 14th I was satisfied enough with the cure of the paint that I put the deck back on for the winter. Did it myself with little effort.

Days before, I did a little fiberglass work inside it. Mostly small patches and laminated over filler I caulked in the bow the year before.

As soon as June arrives I will begin to finish this Batboat. There is not much left to do now. The rest is probably easy compared to what I did this year.


Starting to look like a real boat now! :)

I still have to do a lot of sanding and repairs to the splashwell.


Below is somewhat how I hope my boat will look like when done. Its a different hull but I can pull it off.

1966 Batboat II


I did unusually well financially in September so I ordered a Kodak Zi8 camera. It takes good, basic megapixel photos and HD video. Below are my first pix of the boat.


When I order a high speed SD card I can take videos lasting more than 10 seconds. Here is my first video.

Perhaps a few future updates will be videos.

Batboat Rebuild: Painting The White and Finding Adhesion Problems With The Blue

The first coat of white was rolled on the hull on September 29. By now I've become and expert at painting with EasyPoxy. The first and second coat were so perfect and flawless I decided to not do a third.

Rolling on the layers thin enough to almost see though does the trick. The second coat of white gave such a good coverage there was no need for more.


In comparison to a photo of the original #2 '66 Batboat.

My craft is a different model than the one the original Batboat was based on. The white areas followed the lines of the hull. Mine does not have that hull design so the shape was based upon the original boat but also in keeping a little with mine.

By October 3rd I decided the paint has cured enough to remove the fine line and masking.

There were some adhesion problems with the blue paint. As I carefully peeled off the fine line tape some of the blue just peeled right off with it.

Not only that but I found a spot along the bottom edge where I accidentally rolled a little white on the blue. I started taking it off and the third layer of blue peeled off with it.


After seeking advise at the iboats forum I came to the conclusion that the blue came off where the fine line was perhaps because that is where I pushed the tape down too hard when I ran my finger along it for the last time. The solvent in the white paint may have attacked the blue through the tape making it lift and stick to the tape.

It pulled up and it looked like blue gold leaf stuck to the tape. None of this peeled off beyond where the fine line tape was, thankfully.

I've got some touching up to do in the spring!


Usually this is where people would get the heart sinking feeling, however, I don't have those feelings any more. Being that I live in North Eastern Michigan I have become accustom to day by day disappointment and bad things happening. This did not phase me and I'm ready for some light sanding and touching up next spring. lol :)

Batboat Rebuild: Getting Rid Of Over 20 Tires

Luckily Saginaw County Mosquito Abatement Commission accepts old tires at no charge. I used to work there a long time ago and know all about tires and those little bugs. As I collected the tires I drilled holes in various spots to let water flow out.

There were over 20 tires to haul on September 20th. This took three trips.


I shoved them in really good.

Another load is ready!

It looks dirty but the inside of my backseat was protected with at car cover spread over the seats and floor.

The next day the finished paint job looked great and I took off the masking paper and green tape.

Fine-line tape was left on. To mask the area off for the white painting area you just run fine line along the edge of the old fine line put on for the blue and peel that off. This leaves no overlap or gaps in the paint jobs.


Batboat Rebuild: Painting The Sides

On September 14 the weather was good enough to draw the pattern on the sides. I was able to transfer the original Glastron "scoop" design with no problem. The "point" of the original was 10 inches from the stern. I moved it back to 2 inches to more closely resemble the original Batboat.

From there I eyeballed the rest with pencil. No more than an hour had passed and I was finished. Both sides were a perfect match.

Next I used custom auto fine-line tape to mask it off.


The First Of Three Coats

The white area was masked off with dollar store brown packaging paper and green painter's tape. I ran out of that and used Blue painter's tape that was laying around and later found that blue tape is crap for outdoors.

The first coat was painted on the 17th and several days later the third and final was finished.


Batboat Rebuild: September 9th. Flipping the Hull Over

The boat got flipped. Thanks to unaccountable "friend" I did it myself.

Was able to roll it upright and put it on the trailer without any damage at all.


I hooked it up, cranked the wench to pull it from the bed of tires and on to the trailer. Now I'm able to work on the inside of the boat before winter gets here. :)


I was worried that the still slightly soft paint would be damaged but lucked out.

A couple of small spots got scratched but no big deal. The layers of the two primers were rock solid but the EasyPoxy was not. Paint it on thin folks!

I attempted to eyeball the lines of the cigar shaped white area, pencil it in and make a pattern out of cheap, lightweight dollar store wrapping paper.

The wind blew it to shreds.

I did get to trace the original Glastron scoop details from the sides and used those as the basis for the rest.
The idea is to take a pounce wheel, or pattern wheel, roll perforations through the paper....

... place the pattern on the boat and rub it with dark sidewalk chalk. This transfers the pattern to the hull.

This technique is shown in an indispensable DVD set I found on the net. More on that later.

Wednesday, October 20, 2010

Batboat Rebuild: Rebuilt Trailer and EasyPoxy Painting

On August 25th the gloss white and "Electric Blue" Easypoxy paint and some chopped strand mat fiberglass cloth was delivered by UPS.

Two days later I began to paint the stern and bottom of the hull.

But first....

....Holy Anvil and Hammer! I got my trailer back from the blacksmith the next day!

I visited Barney's Blacksmith the day before to see if it was ready and he almost had it in 100 pieces on the shop floor! I thought a simple spot weld or two would do and drove home worried about the cost.

Turns out he repaired and rebuilt the whole thing from the ground up and only charged $100! I am eternally grateful. He did a wonderful job on it.

It is now level and true, not twisted and bent up. Just like new. :)

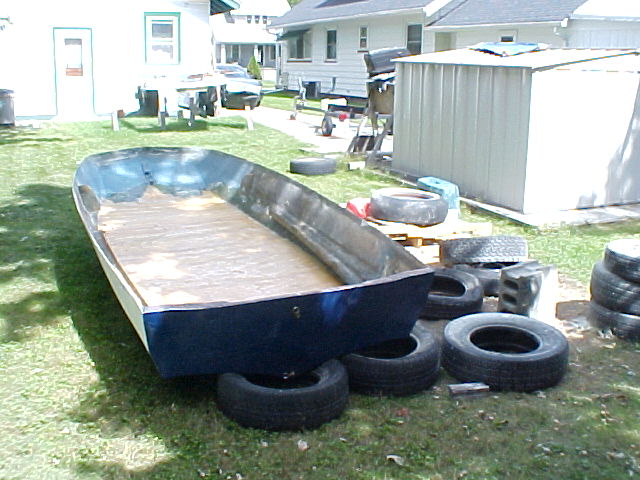
The next day I put the first coat of EasyPoxy "Electric Blue" on the hull. For this I used 4 inch foam rollers, found at most hardware stores. A member of the iboats forum who had just finished working on his fiberglass boat highly recommended them to me.

12 ounces of paint was poured in the pan at a time and I rolled it on easily. There is a trick to keeping a wet edge but its not hard to figure out.

I only coated the stern and bottom going up to the tip of the bow because I still had to flip the boat over and thought that in doing so the paint job may be damaged. That had to wait for later.

That high gloss EasyPoxy Electric Blue marine paint really pops! Unlike the primers I used, it does not take much to get a nice coat. After rolling it the paint spreads out and fills in imperfections very well.

Another two coats need to go on it and then after a 7+ day cure time it goes back on the trailer.


I came upon big problems with the paint. The next day when I sanded with 120 grit the soft paint gummed up the paper quickly. Here is the result. The paint is still like gel.

Much later when painting the white I found the best way to work with EasyPoxy is to roll on coats thin enough to see through a day or more apart otherwise it will not dry properly.

Roll it on real thin folks!

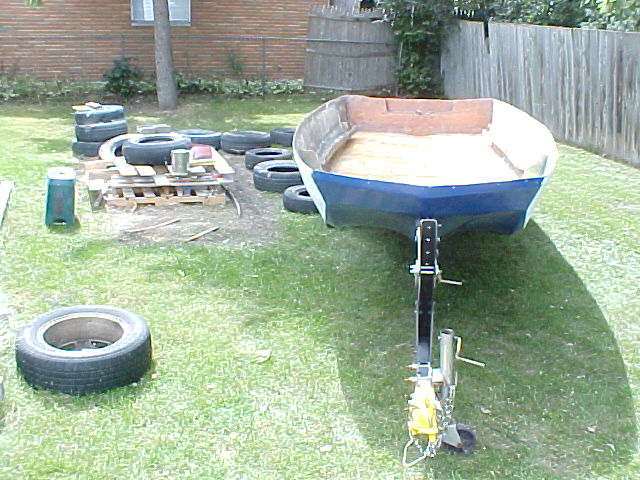
By the first week of September I had three good layers on it and it was ready for the flip.