 I got these stainless steel screws solely for screwing the deck plywood to the cross braces. They are also the same sized as the originals used to join the topside, hull and rub rail together.
These are #10 one inch pan heads. I didn't want to use the longer, 1 1/4 inch screws I already had because the thickness of the deck and braces equaled 1 1/4, taking the chance the screw will go through the bottom of the ply allowing moisture into the sealed ply. One inch screws are better. Plus these are thicker.
The 1 1/4 inchers are for the stringers.
Today I started to permanently lay the deck pieces into the hull.

I pre-drilled the holes in the deck plywood and counter sank where the #10 pan heads go. I used a lot of them!

The locations in the deck ply of all the screws going into the stringers were pre-drilled but not counter sank because they were the flat head 1 1/4 inch.
None of the stringers or braces were pre-drilled into. I wanted the screw heads to draw the deck ply down tight and force it down on top. Pre-drilling may cause some holes to get stripped when screwed the second time, I figured.
 With the deck ply perfectly set into the hull I checked all the holes with a small drill bit to make sure the screws were not going into thin air or through the sides of the stringers. The bit was moved around at angles feeling for surfaces. Where there wasn't any a new spot was marked and drilled.
 The transom end of the deck goes in first.
The ply is perfectly sitting square in the hull. I drilled two screws through this deck through into a stringer and took them out. These points will be used to align the deck back in.

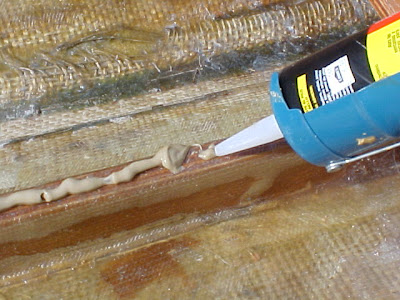
To bed the deck into the boat a generous amount of PL Construction Adhesive is used. This bonds and waterproofs the join of the deck ply to the stringers and braces.
The guys at the iboats.com forum highly recommends this.
 Use a lot of PL Adhesive.
 Glop it on good so it spreads over the edges when the deck is screwed on top.
 Glop it on up to where the deck ends on the cross brace and no further.
This caulk begins to skin in a few minutes so I had to work swiftly.
Putting the two screws back into the deck ply, I lifted the ply over the stringers, aligned them to their holes and dropped the plywood directly on top of the stringers and screwed them in.
 Here is a trick they showed me at the iboats.com boat restoration forum. To further waterproof the screw entries, put some PL Adhesive in the holes. In my case, excess from on top of the structurals oozed up from beneath.
 Set the screw in the hole and drill it in. The caulk is greasy and the screws go in smoothly with no heads popping off.
The screw will take in some of the caulk down with it into the stringer and bury its self in caulk. Excess will ooze over it.
When PL hardens it expands a little. I waited a day and ground the excess smooth.
 This is never coming out and will out live me.
 The second deck ply goes in another day. For now, the PL Adhesive will harden and I checked it out the next day.
It was getting almost dusk anyway.


No comments:
Post a Comment