 This, the 12th day of work on the Batboat, was my first ever attempt at fiberglassing. I laminated the transom together and covered the stringers with polyester resin for later fiberglass work.
I mixed a pint of US Composits' 404 tooling polyester resin with its catalyst and on one side of one of the two transom pieces I brushed it on thick and let it sit in the warm sun to set.

The left over resin was hastefully painted on the stringers. One only has a few minutes to work with the resin before it hardens so it is a good idea to have other projects like this near by if any is left over.
Coating the stringers with resin is like creating a primer coat for the fiberglass cloth I'll need to laminate them with.
Notice that the below photo shows wood screws are at both ends of the stringer sections. I put these on all the stringers so I could lay them between saw horses for resin painting. The only things touching the horses are wood screws.
 After coating one side they can be turned over without leaving marks and they also come in handy for standing them up to dry in the sun without touching the ground.
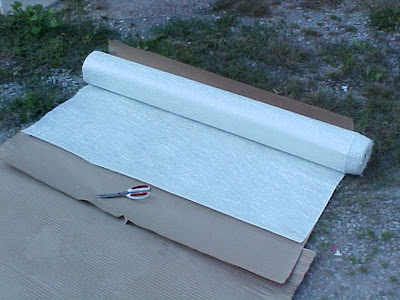
As these were setting I cut the transom pattern out of 1 1/2 oz chopped strand mat fiberglass cloth. When wetted with polyester resin and clamped between the two plywood transom boards this chopped strand mat fiberglass cloth will permanently bond them together.


 I made a second cut for other glassing work I needed to do later.
When finished with that, the polyester resin I painted on the transom ply was still tacky so I mixed up a quart of resin and catalyst which I needed to quickly bond the 1 1/2 oz chopped strand mat cloth between the plys.
This was the first time I ever fiberglassed anything in my life, however, my confidence had been built up over the previous few days by the folks at the iBoats.com forum. I was as ready as I ever would be.
I drilled some holes for stainless steel screws on the half of ply I was to laminate on top, wet the other half down down and carefully laid the 1.5 oz. glass cloth on top, rolling it down with a fiberglass roller to work out all of the air bubbles.
Had to work fast as I coated the top ply with resin and aligned and fit both together with clamps and about 14 stainless steel screws.


 After proudly looking over the work I found a problem. Even though I started putting screws in from the center going outward I discovered that there was still a gap along the part where I cut clearance for the splashwell. I tried to do as much as I could to close it but the lamination had already began to set.
Every other area of this fiberglass and plywood sandwich oozed resin very nicely. I had used too little resin in that spot.
It was only a couple of millimeters of space but my puddy knife still pushed in about 2 inches at the deepest point of the gap. Not good. The force of the engine rests on this plywood and any weak spots in the lamination could cause trouble.
It seemed to be only in this spot of the transom, outlined in red.

To make matters worse the rest of the quart of resin had solidified while I was hurrying to close up the gap. I only had two gallons of resin here!

From this point on I am mixing one pint of resin at a time.
An expensive lesson learned here. This stuff cost $37 plus UPS per gallon.


I was very disappointed and was out of 3/4 inch ply in that size to cut a new transom. The lady friend with the minivan who helped me get the ply from Flint broke up with me the night before, therefore I had no way of getting another sheet.
However, I felt better after the guys at the iboats.com forum assured me that to fix it by pouring new resin into the gap. I did it later and it seemed to work.
If you have a transom cut like this get some deep throated clamps to squeeze down gaps. Screws didn't cut the mustard, in my case.


No comments:
Post a Comment