There wasn't much to show regarding the fiberglassing so I didn't take pix.
The cross braces cleaned up nicely.

Three days later, the several problem spots on the largest stringer were very visible. I'll have to grind out the large bubbles and patch them. No big deal.
The fiberglass going up the sides are not too much of a concern. It is the top edges that need fixing because the deck plywood has to lay on top the stingers flat and even.


 When I was fiberglassing over the second small stringer I decided to let the resin kick in a little so I wouldn't have to stand over it, constantly rolling it back into shape with a fiberglass roller until it stiffened.
The cloth covering the top of the stringer began to get a little stiff. I went to roll it to find the ends touching the hull had almost bonded!!!!!! I tried to ripped it off but one side didn't budge so I grabbed the scissors, cut off what I could and rolled it flat to the hull. This is something I will never do again!
I am out of 1708 biaxial fiberglass cloth so I took the last of there was that had been cut for the second long stringer and used that to finish the job.
 This gave me just one short section of 1708 biaxial left! Instead of glassing it all on at once it was cut into three, each piece overlapping by a couple inches. Rolling it on in sections with overlap turned out to be easier to work with than the one long cloth.
 I finished up the stringer under the bow with four scraps of 1708. Two overlapping with two more on top.
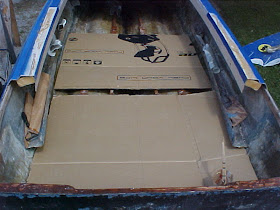
 The fun part of rebuilding this anti-crime cruiser has begun! Hours later after the fiberglass resin had cured I made the templates for the new deck plywood sections.
Thanks to Art Noey Maytag of Saginaw for giving me the free cardboard! It is thick, corrugated and worked great!
The new deck sections will be three pieces of 1/2 inch exterior Douglas Fir plywood cut four foot long. Each butts up end to end. The cardboard was shy four inches but was perfect for what I needed. The following pix show the templates spaced 4 inches apart.


Making these was easy. The deck piece starting at the transom was a uniform 52 inches in width, so was the middle but tapered off to 49 1/2 inches nearer to the bow. The last piece is odd shaped and narrows at varying points. It didn't take too long to get this done.


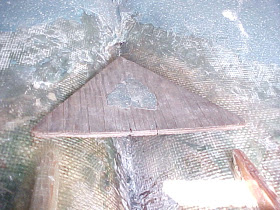
 The triangle plywood you see in the photos is original to the boat and had been fiberglassed in as part of the deck at the tip of the bow. Just as the original deck, it is untreated 3/8 inch ply and will be replaced with 1/2 inch exterior grade Douglas Fir.


This triangle piece was stapled to the front end of the deck ply and was fiberglassed in along the edges. The exposed center was painted over along with everything else under the bow area.
When demolition started on the Batboat I found the ply was moving around loose under the fiberglass!

 It was dusk so all the tools were put away, all around the boat was cleaned up, tarp put back on, and I called it a day.


Nice work. I congratulate you for attempting this project. Rest assured this will be stronger than the original, even with the little blunders we all make. Keep it up~ steve
ReplyDelete